Looking for a heat system that I could use for creating a heat puppet and to use it as a thermo puppet against a thermo Fabric or as a stand alone thermo puppet not manipulated directly by hand
electronic appliances such as hair curler or wax engraver are delivering high heat which is not what we want
looking at peltier module and driving it as instructed here
found also Heating Element Plate Thermostatic Heater(12V/60℃)
Keenso–
60*28*7mm Aluminum Housing PTC Heating Element Plate Thermostatic Heater.
Specification:
Material: Aluminum
Heating Material: PTC Thermistors
Heating Mode: Heat through the flow of air or direct contact with an object
Lead Material: High temperature resistance rubber wire
Leading Wire Length: Approx. 15cm / 5.9 inch
Size: Approx. 60*28*7mm / 2.4*1.1*0.3in
Weight: Approx. 26g / 0.9 oz
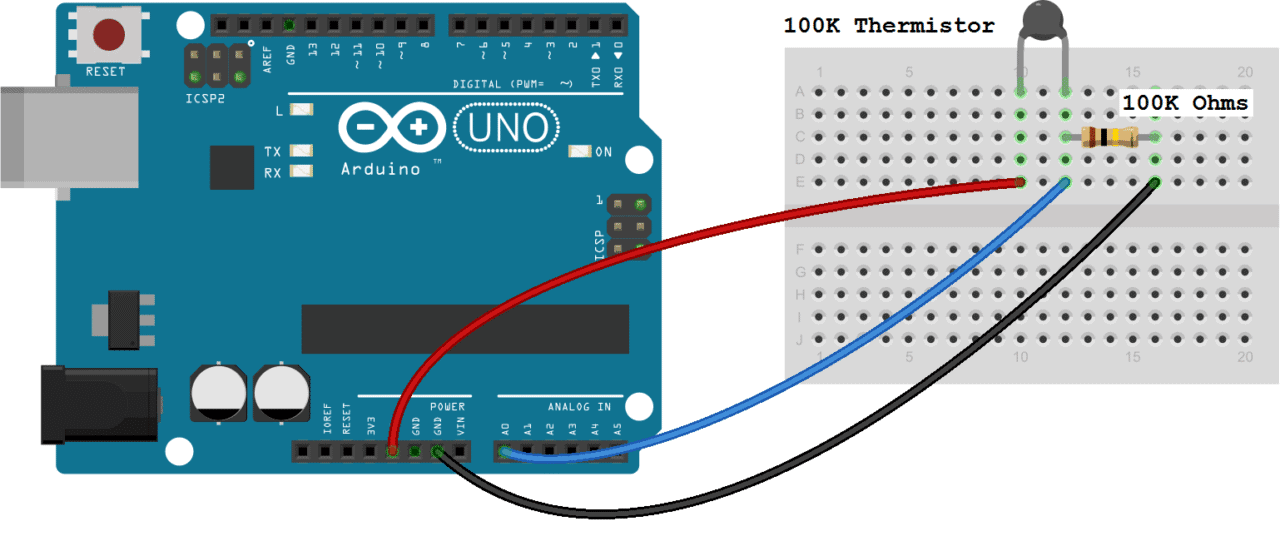
try to hook the thermistor with a a driver to control the temperature and a heat sensor
Self-regulating heaters
If there is a current running through a switching PTC thermistor, it will auto-stabilize at a certain temperature. It means that if the temperature is decreased, the resistance will decrease as well, allowing more current to flow and thus heating the device. Similarly, if the temperature is increased, the resistance is increased as well, limiting the current passing through the device, thus cooling it down. The PTC thermistor has then reached a point where the power consumed is practically independent of the voltage over a relatively wide voltage range.
These PTC thermistors are often made of ceramics in various shapes and sizes and because of their design flexibility, PTC ceramic heaters are a great choice for providing controlled electrical heat. For increased heat transfer, the ceramic heating elements can be mounted on aluminium heat sinks or grids.
What is a thermistor NTC and PTC : read here
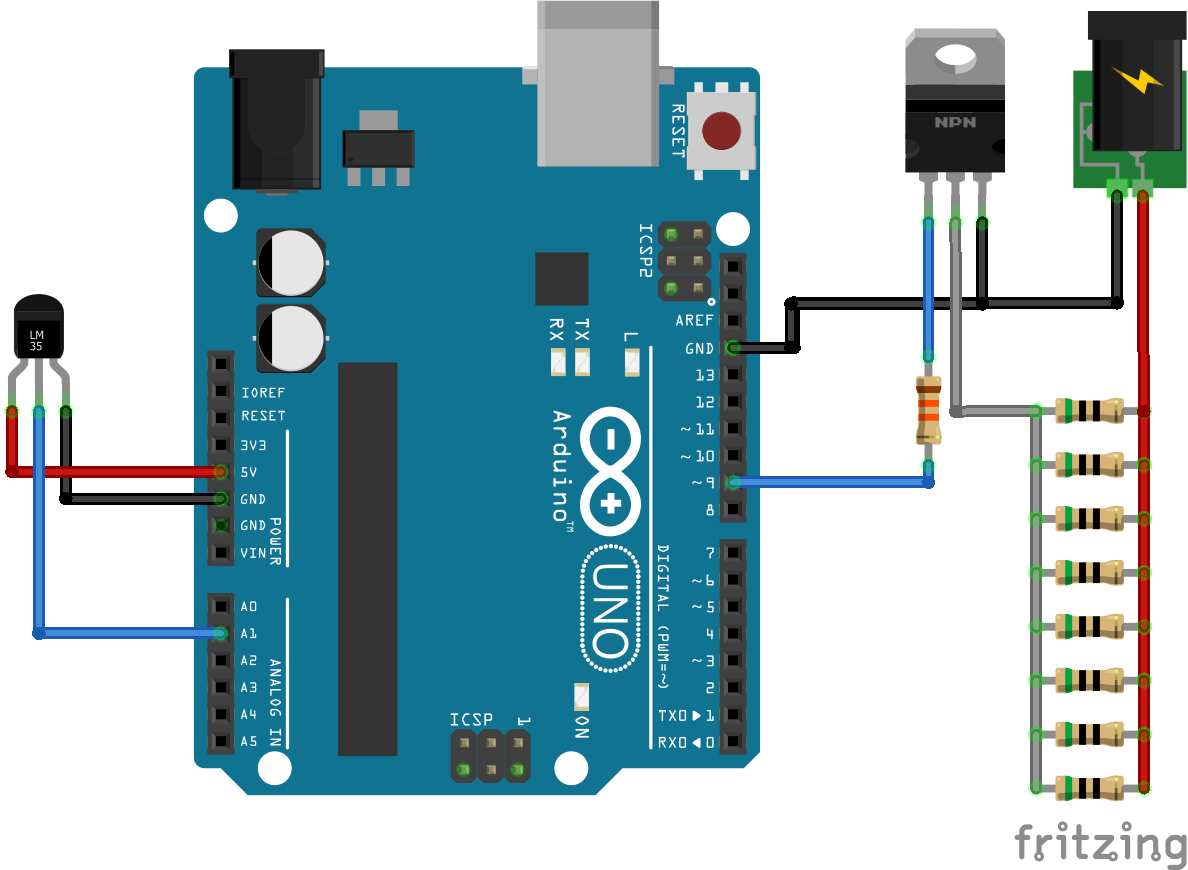
How to Build a heater with arduino part 1 With simple resistors and add a temperature sensor to the design to keep the temperature stable. How to Build a heater with arduino part 2
“a heater that dissipates 3W is generally hot enough to gently warm your hands and feet.”
Build a heater with arduino
resistors
temperature sensor to the design to keep the temperature stable.
create a heater that dissipates 3W. Which is generally hot enough to gently warm your hands and feet. The power will come from a standard 9V battery.
R= V2/P
By plugging the values from our setup, we discover that a resistance of 9xV 2/3W= 27Ω is needed to dissipate 3W of power from a 9V battery.
9V battery has a capacity of 500mAh
Standard resistors are usually graded for1/4 to 1/2 Watts.
A traditional light bulb converts only 10% of the energy it receives into light; the rest is dissipated into heat.
Chargers are usually rater for 5V, capping the amount of current they can provide to 0.5A (500mA).
Heating strips are usually made by connecting all the resistance in parallel, arranged in what is called a resistor ladder.
12 resistors value 330Ω ,1/2 W resistors, to safely dissipating 2.9W.
Calculate how much resistance you need to dissipate the desired power:

“The code provided in this tutorial is simple, possibly too simple for this application. The sensor used is unreliable, making the system excessively sensitive to temperature small oscillations and noise. A better approach would be to take repeated samples over a longer period of time.
Overheated resistors can catch fire and even explode, so be careful.
Secondly, even the way the heater is controller can be improved.